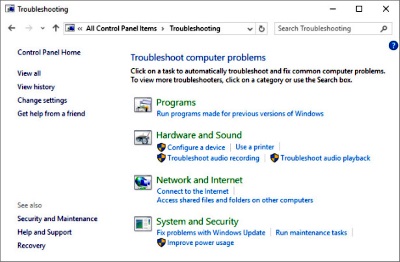
The most obvious first step on the road to resolving performance issues is the aptly named Troubleshooting section in the classic Control Panel. By default, it displays a list of the most commonly used troubleshooters included with Windows 10, as shown in Figure 17-1.

Figure 17-1
Each of the troubleshooters included with Windows 10 launches an interactive problem-solving tool that steps you through diagnosis and resolution of common problems.
Click the View All link on the left of the Troubleshooting page to see an expanded list that includes modules for fixing more esoteric problems, such as issues with search and indexing or with the Background Intelligent Transfer Service.
There's nothing magical about any of these troubleshooters. Their purpose is to ensure that you check the most common causes of problems, including some that might seem obvious (is the network cable plugged in? Is the printer turned on?). Running a troubleshooter can result in easy fixes for some issues; more importantly, it establishes a baseline for further troubleshooting.
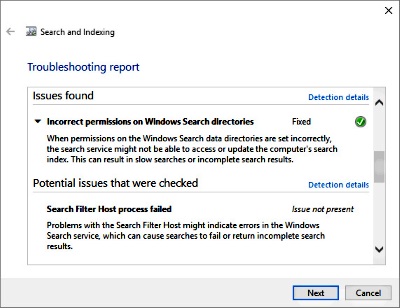
A troubleshooter might lead you through several steps and ask you to check settings or connections. At the end, it displays its results, which include a View Detailed Information link that displays a troubleshooting report similar to the one shown in Figure 17-2.

Figure 17-2
The troubleshooting report lists issues and indicates whether they were fixed. Click the Detection Details link to see more granular information about that item.
More Windows Troubleshooting Articles:
• How to Fix "USB Device Not Recognized"
• How to Find Windows 7 Product Key
• Computer Repair with Diagnostic Flowcharts
• Troubleshooting Windows 7 Inside Out
• PC Troubleshooting - Symptoms of a Bad CPU
• How to Create a Windows XP Boot Disk
• How to Fix KERNEL_MODE_EXCEPTION_NOT_HANDLED Error
• PC Troubleshooting - No Sound
• Windows Don't Start Because of a Corrupted Registry
• Troubleshoot Windows XP with Free Upgrade Advisor

