How to Set Up a Network Printer for a Home or Small Office
By Andrew Varnes

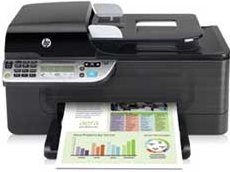
HP Officejet 4500 Wireless all in-one
print, copy, scan, and fax
list $129.99 price: $74.99

Adding a network printer to your home or small office can seem like a daunting task,
especially if it is an older printer, or one that is angled towards office or home office use.
This usually includes many laser printers, and larger printing stations. The task itself is
usually pretty far from intimidating, and we will cover the basics of installing a wired or
wireless network printer on one, or multiple computers in three simple steps.
Note - If your printer comes with an install disk, please use the install disk and disregard
these instructions unless the disk install fails. There may be needed software on the disk
that can cause a manual install to not work properly.
Step 1: Connect your printer to the network
If your printer connects to the network with a standard cable, plug one end into the
printer, and the other into your router... Wasn't that easy?
If your printer connection wireless is, use the control panel, or configuration options
of your printer to connect to the wireless network. This is usually done by going to settings,
scrolling to network settings, and then choosing to turn WLAN on. After that, use the utility
to search for the network you want, and enter the security key using the printers built in
method.
If the printer does not have an option to configure a wireless connection internally,
you will need to download software from the manufacturers website, and use a temporary USB
connection to configure the wireless information.
Step 2: Configure the relevant IP addresses
Most small networks operate fully on DHCP, and the downside of this is that if your router
is rebooted, there is a chance that the new IP address will be assigned differently, and this
can cause issues with the next step. The easiest way to do this is to set up a DHCP reservation
for the printer, so that it is always assigned the same address.
First, print a network configuration page from the printer. You will need it's information.
Then log into your router's control panel. This is almost always done by opening a web browser,
and going to one of two possible addresses (192.168.0.1 or 192.168.1.1) If a password window
pops up, you are in the right place. Consult your routers documentation for the default passwords
if you do not know them.
You may need to consult your specific router's documentation for creating a DHCP reservation,
but the general process on many routers goes something like this: Click on the status tab,
and then look for an option that says something like "connected devices." In this menu, look
for a button labled "DHCP clinets information" Click that, and then reference the configuration
page you printed out earlier. Look for the ip address of your printer in the clients list, and choose
add a DCHP reservation under the appropriate IP. Fill in the fields, and you are all set!
| 
