Easy Visual Basic Image Viewer
By Stephen Bucaro
The easiest way to display images in Visual Basic is to use a PictureBox
control. In this example, we'll use a PictureBox control to create a simple
image viewer application. A PictureBox control acts as a container for images.
You can choose the image to be displayed by setting the PictureBox control's
Image property at design time, or during run time.
Typically, you'll add the image file to your project as a resource so that it's
compiled into the executable file. In this example, we'll use an OpenFileDialog
control to load an image file from disk. Open Visual Basic and follow the steps below
to create a simple image viewer application.
1. Create the Project
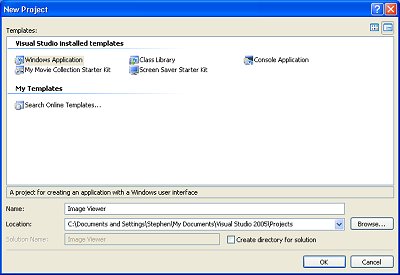
Create a new project by clicking on the File menu and selecting New | Project...
This opens the New Project dialog box. The Windows Application
template is selected by default. Uncheck the box next to [] Create directory for solution.
In the Name: test box, enter a name for your new project, for example
Image Viewer. Click on the [Ok] button.

 A "solution" is a container for several related projects that might share some
of the same code modules. In this example, we don't rally need a "solution", we are
creating a simple project.
Under the Projects folder (i.e. My Documents\Visual Studio 2005\Projects),
Visual Basic will create an Image Viewer folder with several sub folders for
the project's files; bin, My Project, and obj. Visual Basic will then
display Form1 in the design area.
 Windows in the Visual Basic development environment can either float, or
can be docked. If a window starts to float, drag it by its title bar to an
edge of the Visual Basic main window and double-click on its title bar. It will
dock to the nearest edge. If you want a window to float and it docks, double-click
on its title bar and it will float. Double-clicking a window title bar toggles
it between float and dock.
| 
