This article shows you how to take an existing cartoon or other image, and create your own version in Photoshop that you can adapt, modify and improve for yourself!
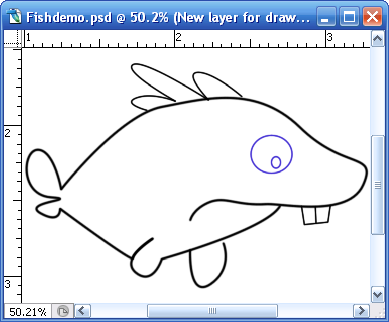
1. Scan a cartoon, photograph or download your favorite image from the Internet (presuming you will not be selling or distributing the resulting work). You can use the sample below if you like, just right-click on and select "Save Picture as..." in the popup menu that appears.
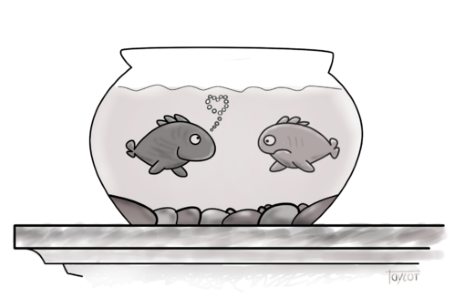
2. Make a new blank file in Photoshop (or any other image editing program that supports Bezier curves).
3. Use 5 inches x 7 inches at 300 dpi as a good starting point for a cartoon.
4. Place the image you wish to copy on a new layer (above a white background layer). In this example, the layer was renamed "Original image".

5. Change the opacity of this layer to 20 percent or so. This will "gray out" the image making your new copy lines easier to see.
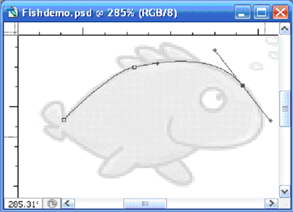
6. Zoom in so you can see the appropriate level of detail and place the cursor where you want. It does not matter how fuzzy the original might be, since you are creating your own new artwork and just using the original image as a guide. However, if your original is very tiny, you may want to rescale it before you copy (use Image|Size with "Resample" checked).
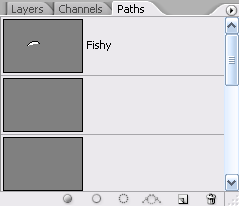
7. Switch to the paths tab, create a new path (called "Fishy" in this example).
8. Use the pen tool to trace over the key lines from the image you wish to copy.
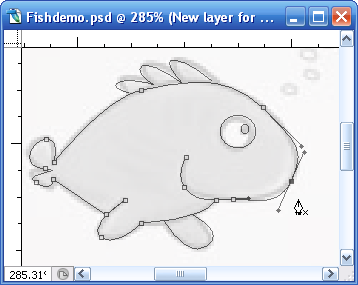
• Don't worry if you don't get the lines in just the right place - you may prefer the changes you accidentally made (sometimes you can get new ideas this way).
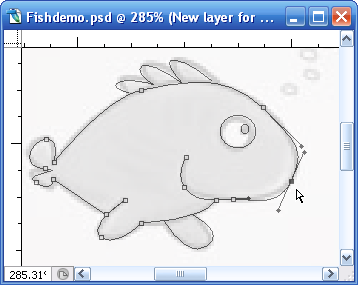
• You can always adjust the anchor points and amount of curvature. While using the pen tool, just press the Control button, and the cursor will change into the direct select tool (white headed arrow). You can then go back and adjust any of the anchor points you previously made.
9. Turn your tracing into your own brand new creation by moving the anchor points around. Try making heads bigger or smaller, turning a frown into a smile, adding extras features (especially funny ones, like hats, silly hair, etc). Once you have a basic path you like, you can make a copy (right-click selected path: duplicate path). Give them new names that make sense. This way you can play around with as many different versions as you like.
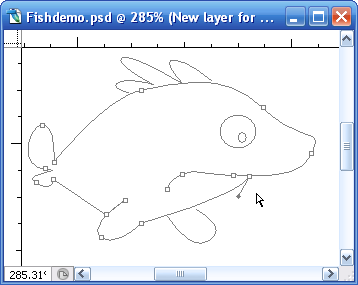
10. Hide the original cartoon (switch back to the layers tab). Click on the eye to make the "Original image" layer invisible. Switch to the layer you wish to draw on - in this example it was called "New layer for drawing".
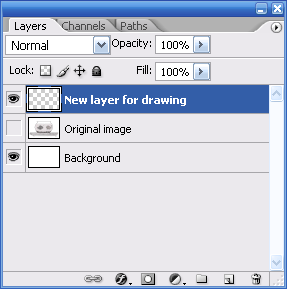
11. Paint some brush strokes on to those skinny little vector lines. Select the path selection tool and shift-click to select all the paths you wish to paint on. Select the paintbrush of your choice. 6 pixels with a soft edge is nice and don't forget to pick the color of your choice. There are several ways to stroke the select paths:
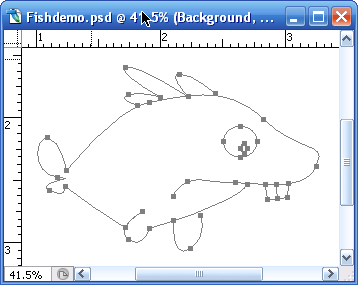
• Click on Edit|Stroke and check the settings in the dialog box.
• If you have the path selection tool selected you can right-click and stroke subpath.
• If you switch back to the paths tab you can click on the little circle at the bottom of this window.
This will also stroke the selected path with the selected brush (with only one keystroke).
12. Use various brush sizes and types to make your cartoon more interesting.
Tips
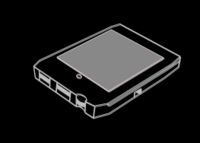
•You can also use photographs to create very realistic looking line art, like this 8 track cartridge made in a few minutes with the above steps.
• Create a library of objects and characters that you can build and grow.
• Look for other articles on how to paint, color and shade your line art cartoons.
• Add captions for a variety of humorous situations.
• Submit to your local school letter, newspaper, society group etc.
People are always looking for amusing additions to liven up their publications,
especially if you provide it for free! If you go this route, be sure that any images
you use are yours, or you have permission from the copyright holder.
Warnings
• Know and respect the copyrights of the original artwork owners.
• Don't just copy other people's work (where's the fun in that?).
• Get inspiration from a variety of different sources, adapt and improve - make it your own!
Article source: wikiHow wikiHow is a group effort to create a great resource: the world's largest free how to manual. wikiHow articles help people solve their everyday problems. wikiHow licenses all content under a Creative Commons License. The license allows wikiHow content to be used freely for noncommercial purposes. The Creative Commons License also allows for the creation of derivative works.
More Graphics Design Tips:
• Graphics Design for Beginners - Blur Filters
• How to Create a Simple Video with Windows Movie Maker
• How to Make a Simple Video
• History of Type Development and Type Terminology
• Selecting Vertices Edges and Faces in Blender
• How to Create a Game App
• SVG Example Code to Skew Elements
• Inkscape - How to Add a New Node
• How to Create a Product Box in Photoshop
• SVG Code for Outlined Letters Text

