Inkscape is a 2D vector drawing program. The location of any point on the canvas is defined by its X (horizontal location from left to right), and Y (vertical location from top to bottom) coordinates. Applications that render in 3D also use the Z axis, (location from in to out). Inkscape's use of the Z axis is represented by layers and is called z-order.

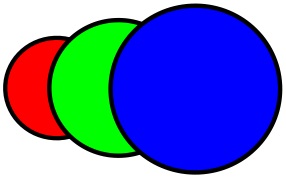
When you first draw an object on an empty canvas, it has a z-order of 1. If you draw a second object, it has a z-order of 2. If you move the second object so that it occupies some of the same canvas area as the first object, it will overlap the first object. If you draw a third object, it has a z-order of 3 and if it occupies some of the same canvas area as the first or second object, it will overlap them. And so on.
When you click on an object to select it, Inkscape will select the object under the mouse pointer that has the highest z-order. If you want to select an object lying below the top object, you can't just click on it.
Selecting Objects in the Z-Order

There are several methods of selecting objects that are lying below objects that have higher z-order. You could use buttons on the Tools Control Bar or the you could use the Layers dialog but the easiest method is to press and hold the [Alt] button while repeatedly clicking over the area where the object you want to select is located. Each time you click, the next lower object in the z-order will be selected.
If you press and hold [Shift][Alt] the objects that you click on in the z-order stack will stay selected, allowing you to select multiple objects in the stack.
An alternative method of selecting objects in the z-order of the entire drawing is to repeatedly press the [Tab] key. This will select objects in order from the bottom of the z-order to the top of the z-order. [Shift][Tab] will select objects in order from the top of the z-order to the bottom of the z-order. However, using this method you will need to use the arrow keys to move the selected object.
Changing an Object's Z-Order
As with everything in Inkscape, there are several methods of changing an objects location in the z-order. In any case, you have to select the object first. The easiest method may be to use one of the keys as listed below.
| Key | Move Selected Object |
| [PgUp] | up one layer |
| [PgDn] | down one layer |
| [Home] | to top |
| [End] | to bottom |

Another easy method to of changing an objects location in the z-order is to use the z-order buttons in the Tools Control Bar. Or you could use the Raise, lower, Raise to Top, or Lower to Bottom selections in the main menu's Object menu.
Selecting Multiple Objects

To select multiple objects, click on the first object, then hold down the [Shift][Alt] keys while selecting additional objects. To unselect a previously selected object in a group of selected objects, just click on it again while still holding down the [Shift][Alt] keys.
While multiple objects are selected, you can use the menu to change all their z-orders simultaneously.
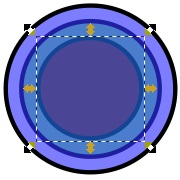
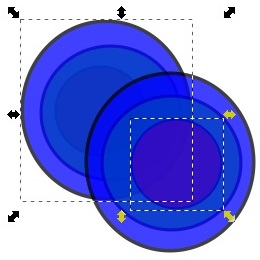
One thing I find useful when doing work that involves changing objects z-orders is setting transparencies. being able to see through objects makes it easier to see exactly what you're doing.
More Graphics Design Tips:
• Building an Image with a Logo
• How to De-haze a Photo with GIMP
• Inkscape Text Kerning
• How to Make a Video Game for your Xbox for Free
• Coding Color for the Web
• MathML File Structure
• Draw Bezier SVG Drawing Application
• Basic Inkscape Vector Drawing
• MathML Basic Elements
• How to Remove PNG and JPEG EXIF Metadata

