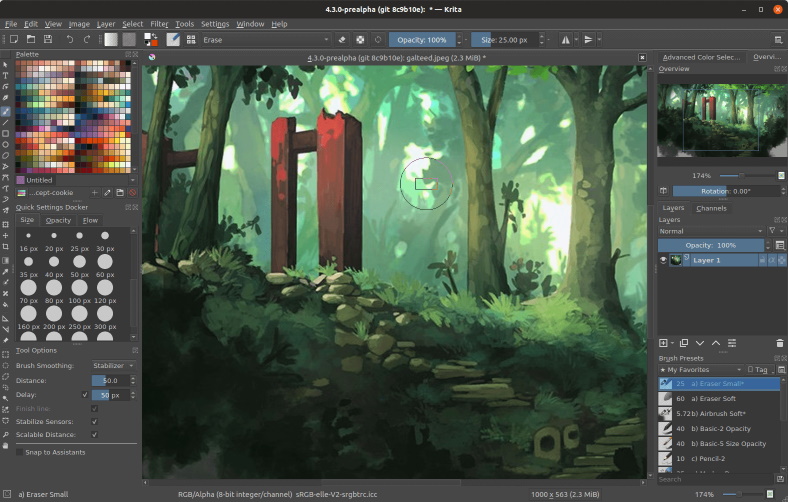
Krita is best known as a digital painting application, but in my experience, it's kind of a digital imaging powerhouse. Recently, a fork of GIMP called GLIMPSE had to pause its development, and because I like alternatives, it occurred to me that Krita could be a reasonable photo editor for at least some use cases. It isn't easy to measure the suitability of an application for a group of tasks because different people require or prefer different things. What's very common and indispensable to one person is an edge case for someone else. However, photo editing applications are broadly known for a primarily universal set of functions, so I decided to look at those likely to be in a top five must-have list and test Krita against each one.
1. Layers
Photo editors have layers. That was one of the first game-changing features of digital photo editors, and it remains one of the most basic requirements. Krita, of course, has layers, and in fact, so many paint and photo applications do these days that I probably could have glossed over it. There's a reason I mention this as a requirement, though. Krita doesn't just have layers. It's got twelve different kinds of layers. Of course, more doesn't always mean better. What matters is what Krita does with all those layers.
1. Paint: The default kind of layer containing raster data.
2. Vector: It's no Inkscape, but Krita does support vector and has several good vector drawing tools. This layer stores vector data, including text.
3. Group: A folder for layers.
4. Filter: A layer containing nothing but an effect, which gets applied to all layers below it, as if you were looking at your image through a special lens. Combined with a group layer, you can apply this lens to only the layers you want.
5. Filter mask: Like a filter layer, a filter mask is a layer that gets attached to just one other layer. Because it is a layer and not just a jumble of settings, it's easy to duplicate on other layers as needed, and it can stack with other filters.
6. Colorize mask: Colorize regions of a picture with just one stroke of a paintbrush. This is very much an illustrator's tool, and I've found little to no use for this tool in photography. It could have interesting results for some photos, though.
7. Clone: An effect layer that updates based on its "parent." It's a little like an alias or symlink for layers and can be helpful when you need one layer to be in more than one place. For example, you can group an effect layer and a clone layer to isolate a special effect without actually moving your source layer from its group.
8. Fill: A layer containing a fill, which can be anything from a solid color to gradient to patterns or noise. Combined with compositing modes, there are great effects you can achieve with this, and because it's a layer type, it's easy to modify and change on a whim.
9. File: Dynamically loads a file as a layer. When the file changes, so does the layer. Never open a dozen files to change a company logo, watermark, or iconography again.
10. Selection: Store selections as layers attached to a paint layer, so you only have to select an important region once.
11. Transparency: Have you ever wanted to paint with Alpha? Now you can. Black paint produces 100% transparency, white paint produces 0%, and all shades of gray are available in between.
12.Transform: Apply transformation to a layer. Because it's a layer type, it's easy to modify and change on a whim.
If the capabilities of these layers somehow haven't convinced you to use Krita as your photo editor, don't worry: Krita has much more to offer.
2. Selections
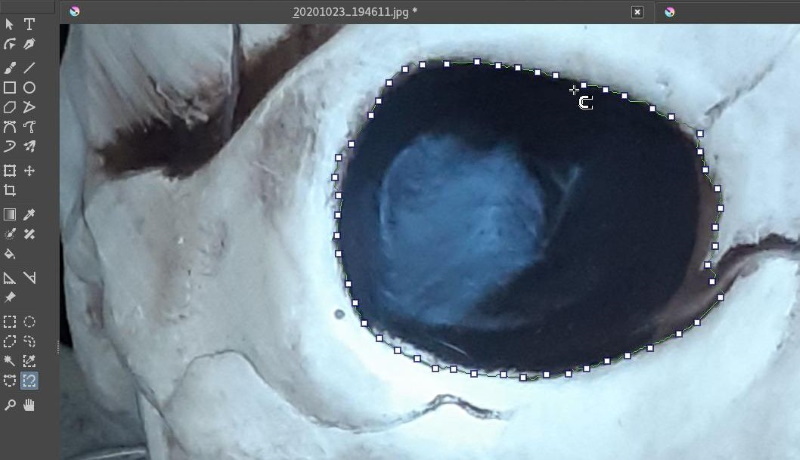
Photo editing applications need the ability to select sometimes complex and uneven parts of a photograph. Sometimes you want to remove an element from the frame. Other times you want to emphasize it, or duplicate it, or adjust it in some way. Krita has all the usual selection tools: rectangle, elliptical, freehand (also sometimes known as a "lasso"), polygonal, and contiguous color.
It also has a similar color selection tool, which is essentially a contiguous color selection for the entire image, contiguous or not

Seth Kenlon, CC BY-SA 4.0
There's also a bezier selection tool and a magnetic selection tool that finds edges as you draw your selection. It's sort of an assisted freehand tool.
This is a great assortment of selection tools, and I do find myself using them for quick and easy selections. However, once I'd discovered Selection Layers and the Global Mask layer, it was hard to use anything else.
To activate the global mask layer, go to the Select menu and choose Show Global Selection Mask. A (temporary) red overlay gets added to your image. Using an assortment of paintbrushes (and Krita has no shortage of variety in that department), you can poke through the mask with white paint or add to the mask with black paint.
Everything you paint white becomes a selection when you click back onto your image layer.
It's a very precise and endlessly editable selection method, and its only fault is that it's so powerful. It's easy to lose hours of your time in pursuit of that mythical perfect mask, so pace yourself.
3. Filters
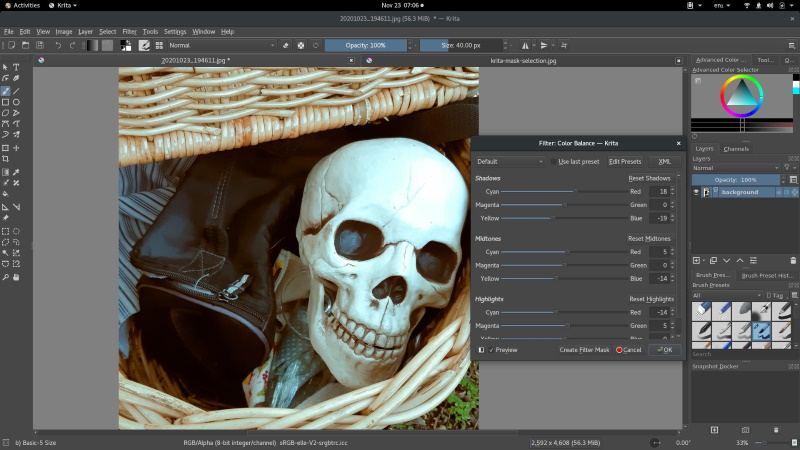
The industry moves in cycles. Once upon a time, drop shadows were the sign of advanced digital artistry, then 3D bevels, glows, gloss, reflection, and of course, lens flare. It's true that filters get over-used sometimes, but when used judiciously, they really are one of the primary reasons photo editors are so useful. Commonplace tasks like color balance, dodging and burning used to be impossible outside of a darkroom.
 Seth Kenlon, CC BY-SA 4.0
Open source has pioneered much of the most advanced imaging software (did you know that content-aware selection was created for GIMP?), and that includes effects. Krita benefits from this and takes full advantage of it. Not only does Krita offer the usual array of effects, like color balance, contrast, levels, threshold, saturation, and so on, but with the wildly popular G'MIC plugin, it offers hundreds of additional filters and effects.
The only things I noticed Krita lacking were spot dodge and burn tools. I rarely use these tools in a photo editor, and you can emulate them with a mask and a filter layer, so it's probably not an issue.
4. CMYK and ICC profiles
I've had plenty of work professionally printed, and I've never had any issue with it, but some people need the CMYK colorspace for their workflow. Krita has both the RGB and CMYK mode and full support for ICC colorspaces, so you can match modes and profiles to other applications in your pipeline.
5. Retouching
If you need to smooth over wrinkles, color in grays, redden lips, brighten eyes, remove a rubbish bin from the background, or otherwise retouch a photo, you're in luck. Digital painting is exactly what Krita was actually built to do. This is what Krita does best, and there are plenty of composite modes to help you integrate your paint with your photo.
Krita isn't just for painting anymore
The Krita development team makes no claims about Krita being a photo editor. Still, after years of enjoying it for digital paint and materials emulation, I've found that Krita's development has, probably accidentally, converged with what a photographer needs. The tools provided by Krita for editing digital paint work just as well for pixels representing a photograph. I've enjoyed opening photos in Krita, and I've been pleased with the workflow and the results. Make no mistake: Krita is its own application, so you do have to re-train your muscles and sometimes approach a task from a different angle, but once you get familiar with the tools Krita offers, you may not want to give them up.
Krita is available for Linux, Windows, and macOS.
On Fedora, Mageia, and similar distributions, you can install it with your package manager:
$ sudo dnf install krita
On Elementary, Mint, and other Debian-based distributions:
$ sudo apt install krita
I use Krita as a Flatpak.
If you want to support the continued development of Krita, you can also buy Krita for Linux and Windows on Steam.
About the author
Seth KenlonSeth Kenlon - Seth Kenlon is a UNIX geek, free culture advocate, independent multimedia artist, and D&D nerd. He has worked in the film and computing industry, often at the same time. He is one of the maintainers of the Slackware-based multimedia production project Slackermedia.
Opensource.com aspires to publish all content under a Creative Commons license but may not be able to do so in all cases. You are responsible for ensuring that you have the necessary permission to reuse any work on this site. Red Hat and the Red Hat logo are trademarks of Red Hat, Inc., registered in the United States and other countries.
More Graphics Design Tips:
• How to Use Draw Bezier
• Introduction to Draw SVG Free Online SVG Drawing Application
• Inkscape Shadows and Highlights
• The Blender Gamekit
• What is the Pantone Color System?
• Coding Color for the Web
• The Game Maker's Apprentice
• MathML Basic Elements
• How to Use Basic Linear Gradients in Inkscape
• How to Make a Simple Animated Banner in Flash CS3

