Inkscape is a highly configurable application. Many of these configuration options can be set through the Preferences dialog box. To open the Preferences dialog box, in Inkscape's main menu choose Edit, and scroll down to the bottom of the menu to select Preferences....
There is probably a hundred things you can configure through the Preferences dialog box. Here I'll describe a couple of the most important ones.
One thing you might want to configure is how bounding boxes work. A bounding box is a rectangular border around a selected object or area. The sides of a bounding box run along the vertical and horizontal axis. A bounding box usually has little squares that you can drag to move, transform, rotate, or scale the object.
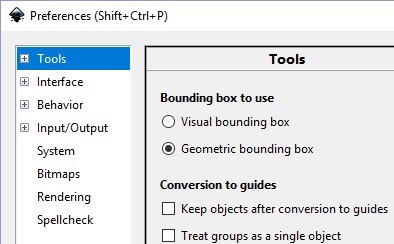
A bounding box should be the smallest size that contains the entire selected object or area. Inkscape has two kinds of bounding box. The Visual bounding box which includes the object including the stroke thickness, and the Geometrical bounding box which uses the objects nodes. This makes a more precise bounding box.

To configure the type of bounding box, expand the Tools branch and click on the text Tools to highlight it and open the Bounding box setting page. Here you'll find radio buttons to set the bounding box to either Visual bounding box or Geometric bounding box.
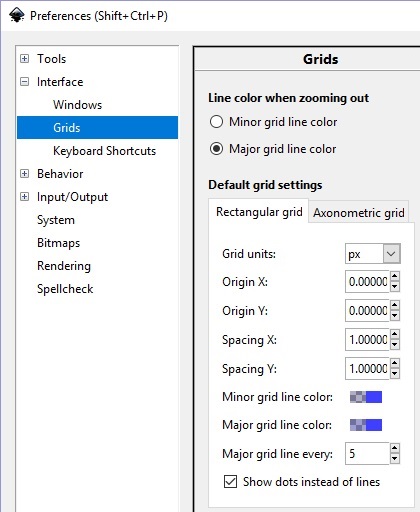
The grid is a very important aid to accurate drawing. But having the canvas so covered with lines may make it cluttered. To set grid preferences, expand the Interface branch and click on Grids to highlight it and open the Grids setting page.

Here you'll find settings for the grid units, the grid origin, the grid spacing, and how many units apart to place grid lines. But the setting I find most interesting is the checkbox [] Show dots instead of lines. Set this checkbox to be able to use the grid without it being so cluttered with lines.
One of the most important actions involved in drawing is moving around (scrolling and zooming) the canvas. Zooming is easily accomplished by tapping the keyboard [+] and [-] keys. Scrolling is easily accomplished by holding down the [Ctrl] key and using the arrow keys, or using the mouse wheel. The mouse wheel pans up and down. Hold down the [Shift] key and the mouse wheel pans left and right.

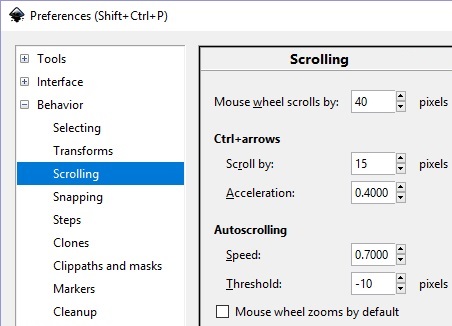
You can configure the speed of scrolling in the Preferences dialog box by expanding the Behavior branch and clicking on Scrolling. At the bottom of the Scrolling settings page is a checkbox [] Mouse wheel zooms by default. I uncheck this box because zooming is quite easy by tapping the keyboard [+] and [-] keys, however panning requires using two keys ([Ctrl] and arrow key) if you don't configure the mouse wheel for scrolling.
More Graphics Design Tips:
• Inkscape - How to Use Bitmap Image Fill Pattern
• Example Code for X3Dom Basic Primitive Shapes: Box, Sphere, Cylinder, Cone, and Torus
• Inkscape: Combine the Paths of Multiple Shapes
• Find Free Stock Photos You'll Actually Want to Use For Your Website or Blog
• How to Make a Simple Animated Banner in Flash CS3
• SVG Code to Place Text on a Curved Path
• SVG Basic Shapes Tutorials
• Inkscape Document Properties
• HTML5 Canvas
• Coding Color for the Web

