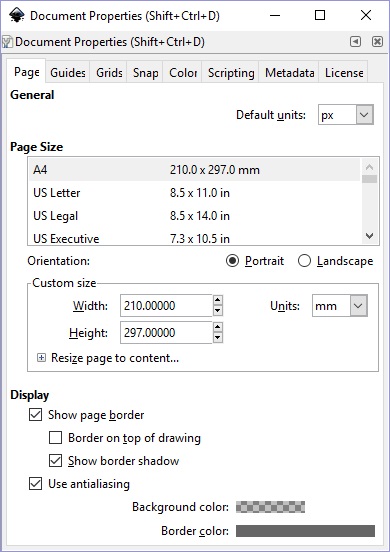
Inkscape Document Properties
By Stephen Bucaro
One of the first things you might do when starting a drawing is to configure the document's
properties. In the main menu select File | Document Properties..., the Document
Properties dialog box will appear.

Page Tab
On the Page tab, you can set the size of the page. You might want to do this if you
are printing or exporting the drawing.
Note at the bottom of the Document Properties dialog box, if you click inside the box next
to background color: or Border color:, a small dialog box will appear containing
color adjustment controls.
Guides Tab
Guide lines can be used to line things up in the drawing area.
In the Document Properties dialog box, on the Guides tab, set the checkbox next to
Show guides. If you click inside the box next to Guide color: or Highlight
color:, a small dialog box will appear containing color adjustment controls.
As you move the mouse pointer around the canvas you'll see tiny arrows on the rulers that
move to stay horizontally and vertically aligned with the mouse pointer. Place the mouse pointer
over one of these arrows, press and hold the mouse button while you drag onto the canvas,
a guide will appear.
• Dragging the horizontal arrow creates a vertical guide.
• Dragging the vertical arrow creates a horizontal guide.
• Placing the mouse pointer in the upper-left corner of the drawing area and dragging creates a 45 degree guide.
Each guide has a small circle located on it. Holding the mouse pointer over the circle until
it changes into a hand pointer and then pressing the [Shift] key causes the rotate icon to
appear, allowing you to rotate the guide line to any angle you prefer.
• I find that if you hold the mouse pointer exactly over the circle, instead
of being able to rotate the guide line, you'll only be able to move it.
To delete a Guide, place the mouse pointer anywhere over the guide line so that it changes
into a hand pointer and then pressing the [Delete] key.
| 
