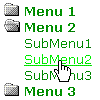
Easier Expanding Menu Code
By Stephen Bucaro
In a previous article, I described a method to create an expanding menu similar to Windows Explorer,
but with only one level of sub-menus. One nice feature of that expanding menu was that when you
expanded a menu, the previously expanded menu would unexpand. This helps limit the total length of
the menu, but it requires the use of a Java Script array. Every time you expand a menu, the code
searches the array for any expanded menus and un-expands them.

Maybe you don't care, or don't desire previously the expanded menu to un-expand. Or maybe you want
some easier code and whether the previously the expanded menu to un-expands is a lower priority. In any
case, this article provides you easier expanding menu code by losing automatic menu unexpand feature
(you need to click to unexpand a menu) and adds some easy CSS code to provide nice mouse over effects.
This example requires three blocks of code, html to create the menu, CSS to expand and unexpand
menus and add mouse over effects, and Java Script attached to the html elements onClick events
to modify their CSS properties. I promise you that all this code is extremely simple. First let's
start with the html. Shown below is code to paste into your webpage to create a menu.
<a class="menu" href="#" onClick="return toggleMenu('1')">
<img id="i1" border=0 src="closed.gif"> Menu 1</a><br />

<span class="submenu" id="m1">
<a class="menulink" href="#">SubMenu1</a><br />
<a class="menulink" href="#">SubMenu2</a><br />
<a class="menulink" href="#">SubMenu3</a>
</span>
This code creates a top level menu. Replace the text "Menu 1" with the title of your menu. This
menu contains three sub menu items. In each sub menu line replace the # character with the link for
your menu item. You can delete sub-menu lines if you don't need three sub-menu items in your menu.
You can add as many sub menu items as you need by simply adding more lines. Note that there is a
line break <br /> tag at the end of every sub-menu item line, except the last one.
You can create as many of these top level menus as you need by simply pasting another code block
below the ones you already have, but you need to make some minor edits to each new menu, as indicated below.
• Increment the number passed by the toggleMenu function in the first line.
• Increment the id of the image in the second line, ie from "i1" to "i2".
• Increment the id of the "submenu" span, i.e. from "m1" to "m2".
For example, shown below is the code for the second top level menu.
<a class="menu" href="#" onClick="return toggleMenu('2')">
<img id="i2" border=0 src="closed.gif"> Menu 1</a><br />

<span class="submenu" id="m2">
<a class="menulink" href="#">SubMenu1</a><br />
<a class="menulink" href="#">SubMenu2</a><br />
<a class="menulink" href="#">SubMenu3</a>
</span>
You can add as many top level menus as you want, as long as you increment those three items in
the code for each one you add. In each top level menu, you can add or delete as many sub menu
items as you need.
| 
