
A computer's Basic Input-Output System (BIOS) is embedded software on a motherboard that will control attached hardware. It provides an operating system with information about hardware, and is designed to support a specific range of components. The BIOS itself is typically an EEPROM, or Electronically Erasable Programmable Read-Only Memory, that is programmed with "firmware" and has the ability to save small amounts of information specific to user configurations. BIOS components are often soldered to the motherboard and therefore not serviceable by the user. Still some of these can be inserted into a socket, allowing its replacement.
All BIOS components are serviceable via a firmware upgrade that is known as "flashing" this process is called "updating the BIOS". The process itself is fragile since any power fluctuation during a flash may irrevocably corrupt a BIOS' firmware. Great care will need to be taken in order to safely accomplish this.
This guide will help you flash your BIOS by taking precautions and walking you through each step. Not all computers will have the same BIOS manufacturer, let alone the same process, but many have similar steps and precautions.
1. Determine your needs. Did someone help you update the BIOS last month? Maybe the BIOS has never been updated since you purchased your PC years ago. Did you discover an updated version will fix a problem you are experiencing? Answers to these questions will help determine if you need to verify version numbers and whether an update is necessary. Not all BIOS updates are necessary, but for the hardware enthusiast, obtaining the latest BIOS may equate to better performance.
2. Determine your system's origins. This is an important first step to determine where to locate and download the correct BIOS update version.
• For desktops, did you purchase this computer as a bundled, pre-built system, or was it assembled from purchased components? The larger, more popular manufacturers and builders include companies such as Dell/Alienware, HP/Compaq, IBM, Lenovo, Sun, Gateway, etc. For these, visit the manufacturer's site. For a custom system built from purchased components, visit the motherboard manufacturer's website.
• For laptops, visit the laptop manufacturer's site, such as Dell/Alienware, HP/Compaq, Acer, Toshiba, etc.

3. Discover what update methods are available. Not all BIOS updates are performed in the same manner. The desktop or laptop system or motherboard manufacturer determined in the steps above provide support information about BIOS update methods they offer. Some motherboards can be updated by executing a program from the operating system level after booting from the hard disk. In other cases the system must be booted from a floppy disk; CD or USB thumb drive (using software supplied by the system or motherboard vendor).
Some manufacturers will use their own custom application to update the BIOS, others will use a third party utility to update the BIOS while booted from the legacy DOS operating system. The latter may be split into two different files, or bundled together as a CD or floppy image with an extracting application. Download the appropriate updating software and BIOS from your manufacturer's website.
4. Backup your existing BIOS first! If using BIOS update software executed from Windows or another operating system, backup the existing BIOS image first. Some BIOS update software versions have this functionality built-in (e.g., "Save" or "Backup"), and will advise you to perform a backup first.
5. Perform the update. Run the downloaded installer or application executable for the BIOS updating software. If the software prompts you for a floppy, use a formatted 1.44MB 3.5" floppy disk. It doesn't matter if the floppy is blank or not because the data will be overwritten if you don't mind wiping the disk.
1. If using a floppy, insert it into the drive and restart the system to boot from it. Some floppy images contain an "autoexec.bat" file to automatically run the BIOS update. Others will just have the update software, the updated BIOS image, and possibly a 'readme' text file containing directions. If there are no directions, but there are at least two files (ie: "A06_123.bin" and "awflash.exe"), follow this example: Enter a command such as "awflash A06_123.bin" and press enter. This will execute the update software and specify the A06_123.bin file to flash the BIOS.
2. Compare the two versions. Most BIOS update software will read the existing BIOS image and determine its version, then compare this to the downloaded BIOS image. If the system's existing BIOS version is older, perform the update. The user interface of BIOS software may vary greatly, yet typically menu buttons or selections such as "Write", "Update", or "Confirm" will perform the BIOS update.
6. Power cycle the computer after the update is completed. Many update programs will automatically power cycle the computer. Some will request your permission to do so while others will warn about this before starting the update. A few will prompt you to power cycle the system yourself. If you're forced to handle this yourself:
1. Completely power down the PC by either pressing the
power button or initiating the power off sequence from the operating system.
2. Flip the master power switch on the back of your PC to the off position, if applicable..
3. Wait a minute..
4. Flip the master power switch back into the on position, if applicable..
5. Power up the PC..
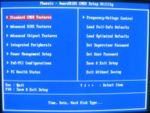
7. Clear the existing BIOS settings. Only clear the BIOS if recommended. This is not always necessary, depending on what features have changed between the existing version and the updated version. When the PC is powering up, immediately initiate execution of the BIOS utility. For most systems, this is done by pressing the [Delete] key on the keyboard within the first 2 - 10 seconds of turning the computer on. Other systems might use other keys such as [F2], [F10], [Ctrl][Enter], etc. If you don't know the keystroke sequence for entering the BIOS utility, watch the monitor to see if the computer displays it.
To clear the BIOS settings, look for an option to "Restore Defaults" or "Load Fail-Safe Defaults". This may be on the main page of the BIOS utility or on the last page of a tabbed menu. Use the arrow keys to navigate, and follow the on-screen instructions. When complete, save the settings and exit the BIOS utility.
8. Configure the BIOS. If you know the settings you want, change them now. If you have never changed BIOS settings before, it is not required to do so. Most PCs will function just fine using the default BIOS settings.
Tips
• BIOS updates may be released to fix existing bugs, add support for new hardware and standards or add functionality. Read the release notes or other documentation for the BIOS update you're considering to see if the update will benefit your PC.
• If your system is currently working well, perform a BIOS update only if you're willing to part with it (for an extended period of time) in the event of a critical failure. System builders and motherboard manufacturers will often repair systems and motherboards that failed to take a BIOS update, provided they are still under warranty. Yet, this process is a lengthy one, often involving the following steps:
1. Contact technical support and verify the problem is
related to the BIOS update.
2. Obtain a Return Merchandise Authorization (RMA) or similar tracking number.
3. Ship the product back to the builder or manufacturer.
4. Wait for approval (testing) and repair or replacement.
5. Wait to receive the product shipped back to you.
• If the BIOS firmware has become corrupted and you have a similar motherboard with the same CPU socket and a BIOS chip of the same type, you may be able to recover your corrupt BIOS if you are willing to risk the other BIOS chip.
1. Take the non-working bios chip out of its motherboard and
set it aside to keep it safe.
2. Take the working bios chip out of the working motherboard and insert it into the other
motherboard, but do not press it all the way into its socket. Only place the chip so that
its connectors are touching the sockets contacts firmly.
3. Attempt to boot the motherboard with its temporarily installed bios chip. You must get
the system booted to a floppy disk which contains the correct bios and installer for the
broken motherboard. Do not flash the working bios chip.
4. Gently use a chip puller or pair of small screwdrivers to remove the working bios chip
from its socket. Be careful not to touch anything metal with the tools, as you must leave
the system running for this. Set the working bios chip aside.
5. Insert the corrupted bios chip firmly into the slot in the running motherboard. Again,
be careful not to touch anything metal.
6. Flash the corrupted bios.
7. Cross your fingers and reboot.
8. If it worked, reinstall the working bios chip back in its motherboard.
• Make sure to obtain the BIOS upgrade software from a reliable source. Downloading a BIOS from sources other than the manufacturer's web site is risky. For example, versions from the same BIOS software developer for one manufacturer's motherboard may not work on a different manufacturer's motherboard. Using the wrong BIOS or version might "brick" the board, thereby requiring either a BIOS replacement or reprogramming of the BIOS by the manufacturer and rendering the computer unable to boot until that is done.
• Make sure the electrical power source is reliable when flashing a BIOS. Any sizable fluctuation or loss of power during a flash process can corrupt the BIOS. Therefore, never power down or reset a PC when flashing the BIOS. If flashing the BIOS from a booted OS, first disable all unnecessary applications and background processes.
• Avoid updating the BIOS unless you know exactly what you are doing. Failure to follow a manufacturer's directions and precautions may corrupt the BIOS as well.
Article source: wikiHow wikiHow is a group effort to create a great resource: the world's largest free how to manual. wikiHow articles help people solve their everyday problems. wikiHow licenses all content under a Creative Commons License. The license allows wikiHow content to be used freely for noncommercial purposes. The Creative Commons License also allows for the creation of derivative works.

More Maintain and Upgrade Your PC Articles:
• Be the Master of Your Printer
• Satellite Internet Service Basics
• Free Download Patch My PC Checks for Available Patches
• Vista's New Boot Loader Architecture
• Why Not Defragment Your Hard Disk Today?
• How and When to Upgrade Your Sound Card
• Video - How To Refill Your Laser Printer Toner Cartridge
• Printer Cartridge Price Fixing
• Laptop Batteries 101 - A Buyer's Guide
• Free TweakUI User Interface Configuration Utility