
When you open a new Inkscape drawing, the zoom level is set to 35% by default. The first thing I do with every new Inkscape drawing is use the Zoom control located on the right side of the toolbar located at the bottom of the Inkscape window to set the zoom level to 100%. I just type 100 into the control's input box.
Since, on the Internet, I find many complaints about new Inkscape drawings opening at 35% zoom rather than 100% zoom, I assume almost everybody has to make this correction to begin a drawing. Some sources claim you can get new drawing to open at 100% zoom by default by editing a template located in the install directory of Inkscape.
![]()
After setting the zoom level, in the Toolbox on the left side of the window, click on the rectangles and squares tool. Then locate the mouse pointer somewhere within the page border. Then press and hold the left mouse button and, while holding down the mouse button, drag the mouse to draw a rectangle. Release the mouse button.
![]()
You've already learned how to draw a rectangle in an earlier section. This time, in the Toolbox on the left side of the window, click on the select and transform objects tool. Then locate the mouse pointer somewhere within the rectangle that you drew and click the left mouse button.
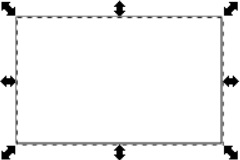
The rectangle will be selected, as indicated by the appearance of selected handles on the sides and corners of the rectangle. Once an object is selected, Inkscape applies it full attention to that object, and most commands that you issue will be applied to that selected object. If you place your mouse pointer inside a selected object, the move cross will appear with the pointer. While the move cross is visble, you can press and hold the left mouse button to drag the object to a new location.
If you place your mouse pointer inside a selected object and the move cross is visble, you can press the right mouse button to open a poup menu of commands that you can apply to that selected object.
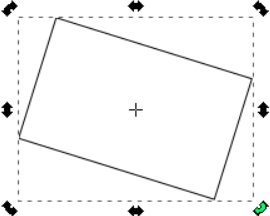
If you click on an already selected object, the rotate handles will appear. While the rotate handles are visible, you can place the mouse pointer over one of the corner rotate handles, push and hold the left mouse button, and drag to rotate the rectangle.
The cross inside the rectangle marks the center of rotation. You can drag the center of rotation with you r mouse pointer to a different location. The center of rotation does not have to be within the object.
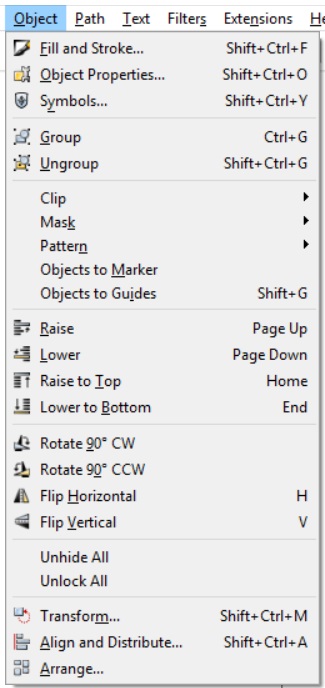
The Object selection in the main menu gives you a large choice of functions that you can apply to a selected object, including Rotate 90 degrees CW>, Rotate 90 degrees CCW, Flip Hrizontal, Flip Vertical, or Transform.
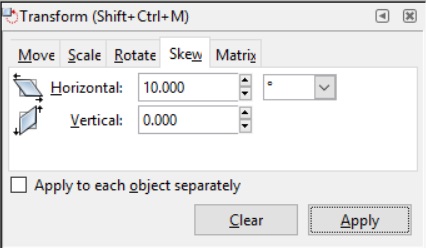
If you choose Transform, the Transform dialog box will appear. Transforms are an extremely powerful way of modifying the shape of objects. That's an advanced subject that we'll get into at a later time.
For now, let's select the rectangle, place the mouse pointer inside, and press the right mouse button to open the poup menu of commands that you can apply to that selected object. In that menu, select Fill and Stroke.... This will open the Fill and Stroke dialog box.
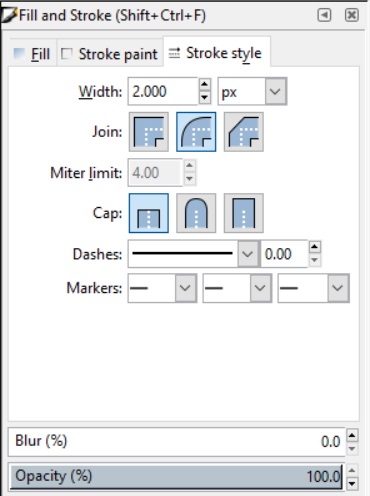
The Fill and Stroke dialog box lets us set many visual aspects of the selected object. For example if we select the Stroke style tab and change the width form 1.000 to 2.000, the width of the rectangle's border will increase.
![]()
One last thing I want to cover is the Edit paths by nodes tool. In the Toolbox on the left side of the window, click on the Edit paths by nodes tool. Then locate the mouse pointer somewhere within the rectangle that you drew and click the left mouse button.
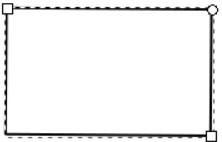
This will cause the rectangle's nodes to be selected. With the node tool pointer over the round node in the upper-right corner of the dialog box, press the left mouse button and drag the node downward away from the corner.
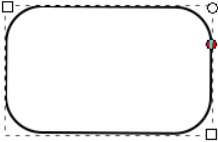
This will allow you to adjust the roundness of the rectangles corners. This method adjusts all four corners equally, you can not set separate radius for each corner. At least not with this method. Stay tuned.
More Graphics Design Tips:
• Basic Inkscape Text
• SVG Basic Shapes Tutorials
• Inkscape Grouping
• Tips For Hand Coding MathML
• Inkscape Basics
• RGB Vs CMYK
• MathML File Structure
• SVG Example Code to Skew Elements
• Inkscape - How to Delete a Node
• Inkscape Layers and Z-Order

