
A hazy photo like this is trivially easy to correct with GIMP.
Haze and color casts in photographs can ruin a good photo; fortunately, they are trivially easy to correct with GIMP, the foremost open-source photo editing software. Here's how.

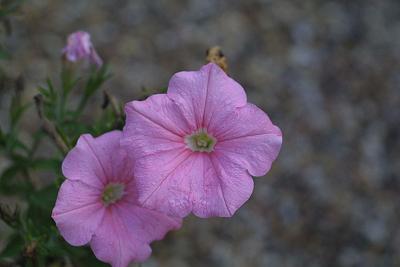
Sometimes automatic white balance will fix the problem; other times, it will have
strange effects like this.
1. Try the easy way first. Go to the Colors | Auto | White Balance menu. More often than not, this will fix haziness and color casts sufficiently well. The rest of this article is only relevant if this has unusual effects.
2. Bring up the Levels dialog with the menu Colors | Levels.

"Dead" spots in the histogram, to the left and right, are usually indicative of hazing.
3. Observe the "dead spots" in the histogram. The histogram will show areas on the left and right which are "flat-lined", or close to it. Move the sliding arrow on the left past the dead spot on the left, and likewise for the arrow on the right. If there are colour casts on the image (e.g. if the original has, for example, a red haze) then don't hit OK yet; go on to the next step).

You can be aggressive moving the slider on the left side of the histogram.
4. Fix any colour casts. At the top of the Levels dialog that you opened, you'll notice a drop-down box (labeled Channel), with three options: Value, Red, Green, and Blue. Pick whichever of the latter three matches the color cast of your image. Again, you will see a "dead spot" towards the left hand side; move the slider past this dead spot. You can be pretty aggressive about doing this. Do the same on the right hand side, but be more judicious about it. You may find that you need to repeat this on the other channels, as well. Hit "OK".

Use the "Unsharp Mask" filter with a large radius.
5. Apply lots of "Unsharp Mask". Go to Filters | Enhance | Unsharp Mask. Use a very large radius (50px or more), and a relatively small "Amount" (somewhere between 0.10 to 0.20 should suffice). After that, optionally, apply another pass of Unsharp Mask at something close to its default settings (with "Radius" set to 5px, "Amount" set to .50; you may want to set "Threshold" to a non-zero value to avoid bringing out too much noise), to sharpen the image a little.
6. Admire the finished picture. Or if the editing still didn't have the desired effect, experiment further until you get it right.
Article source: wikiHow wikiHow is a group effort to create a great resource: the world's largest free how to manual. wikiHow articles help people solve their everyday problems. wikiHow licenses all content under a Creative Commons License. The license allows wikiHow content to be used freely for noncommercial purposes. The Creative Commons License also allows for the creation of derivative works.

More Graphics Design Tips:
• Free Replacement for Overpriced Photoshop
• MathML Elements to Display Subscripts and Superscripts
• SVG Example Code to Skew Elements
• How to Make a Simple Animated Banner in Flash CS3
• SVG Code to Create a Rectangle and Text and Translate as a Group
• Coding Color for the Web
• Krita Paint plus Vector Drawing Portable Application
• Basic Inkscape Text
• Inkscape Shadows and Highlights
• Building an Image with a Logo