A filter is a complex mathematical algorithm that is applied to the pixel data in an image. There are filters to modify the color of an image, to enhance an image, to distort an image, and to create many other effects. The blur filter, as its name implies, is used to make an image more blurry. Why would you want to make an image blurry?

• To add artistic effects. For example to add the impression of a hazy autumn afternoon to a scenery picture, or to soften a shadow.
• To hide information. For example to hide an address or license plate number in a picture.
• To highlight part of an image. For example to highlight a foreground object in a picture, you can blur the background. In an image used for educational purposes, you can blur a picture of an object - except for the feature you are referring to in the instruction.
• For legal reasons. For example if a trademark appears in a picture. You can blur the trademark to make it unrecognizable and avoid infringement issues. If your picture shows a person in the background and it's use might infer that the person endorses a particular product. You can blur the persons face to make them unrecognizable to avoid a law suet based upon using their likeness for profit.
In this article I show you how to use the various blur filters on your images. I'll use the GIMP image editing program. GIMP stands for "GNU Image Manipulation Program", GNU standing for GNU General Public License. GIMP is an image editing program on the level of Photoshop but without the $800.00 price tag, in fact it's totally free. GIMP was originally created for Linux, but is now available for Windows.
Download GIMP for Windows from: GIMP for Windows.
Similar to most open-source software, you can't just install GIMP by executing a single setup program, you need to download three files and install them separately.
- GIMP for Windows (7.8 MB)
- GTK+ 2 Runtime Environment (3.7 MB)
- GIMP Help (22 MB)
Extract the three zip files into a new folder under Program Files (for example named "GIMP"), then double-click each setup file, starting with the GTK (GIMP Tool Kit), then GIMP, and then Help. This is the order in which the components look for each other as you install and use them.
|
|
When you first open GIMP, the Main Toolbox window is visible. To open an image, In the Main Toolbox File menu select Open.... In the Open Image dialog box that appears, navigate to the image file and select the image file name, then click on the [Open] button. The Image Window will appear and display the selected image. |
Simple Blur
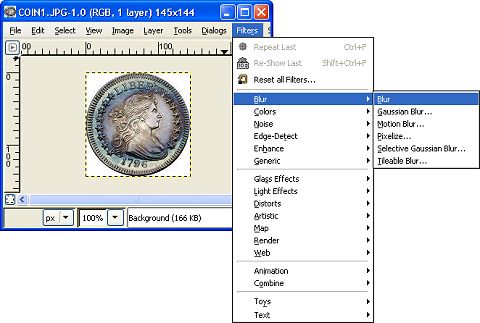
To apply the Blur filter, in the Image Window menu, select Filters > Blur > Blur.
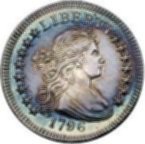
The Simple Blur filter sets the value of each pixel in the image to the average of that pixel and the adjacent pixels. The Simple blur effect is good on small images, but is hardly perceptible on large images.
Gaussian Blur
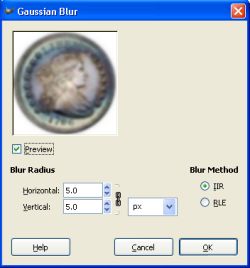
Selecting Gaussian blur causes the image to appear in a Preview window, where you can set the Blur Radius and Blur Method. In GIMP's preview windows, the Preview checkbox must be checked to view the results.
IIR stands for "Infinite Impulse Response". This algorithm works better for large radius values and for images which are not computer generated. RLE stands for "Run-Length Encoding. RLE is best used on computer generated images or those with large areas of constant intensity.
Gaussian blur is the most useful of the blur filters because it works fast and gives you control over the amount of blur.
After you have adjusted the Gaussian blur to your satisfaction, clicking on the [OK] button will cause the Image Window to be updated. In the Image window where you can perform further processing, or select File>Save As... to save your work.
Motion Blur
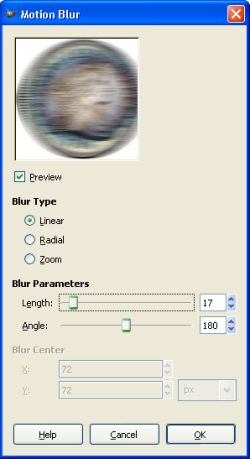
The Motion Blur filter causes each pixel to be blurred a specific amount in a specific direction, creating a sense of motion. The Preview window provides radio buttons where you can select the type of motion blur, Linear, Radial, or Zoom.
Selecting Linear blur allows you to adjust the Length and Angle of the blur. This is equivalent to setting the direction and speed of the impression of motion.
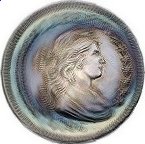
Radial motion blur creates a circular blur, like the effect of a spinning object. The Preview window provides a slider control for the Angle of the blur and text boxes for the x and Y positions of the center of the circular blur. More angle creates more blurring.
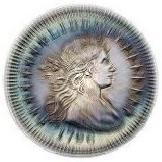
The Zoom motion blur creates a blur that radiates from the center of the image, creating the impression that the object is moving toward the viewer. The Preview window provides a slider control for the Length of the blur and text boxes for the x and Y positions of the center of the zoom blur. Less length allows the center of the image to remain sharp while the outer areas become blurred toward the center.
Pixelize
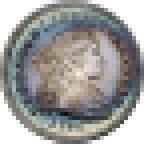
The Pixelize Blur filter replaces the pixels in an image with fewer large pixels.
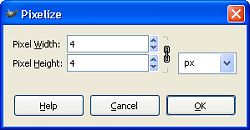
Selecting the Pixelize Blur filter causes a dialog box to appear where you can set the size of the pixels in the image. The "chain" icon next to any two controls in GIMP means their values track each other. Click on the chain icon to break the chain and adjust the values independently. Click on the chain icon again to close the chain and set tracking.
Selective Gaussian Blur
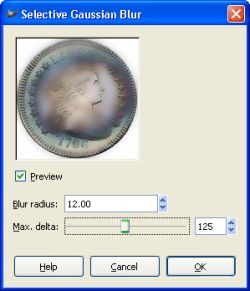
The Selective Gaussian Blur filter allows you to set the Blur Radius and allows you to set a Max.delta that causes only pixels below that difference threshold to be blurred together. This filter is often used to reduce the graininess of photographs.
Tileable Blur
The Tileable Blur filter uses the Gaussian algorithm to wrap blurring around the edges of an image. It's often used with images to be used in tiled backgrounds to soften the seams between tiles.
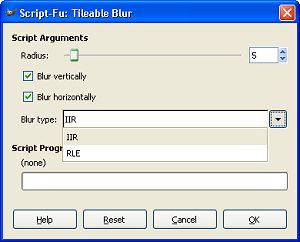
Selecting the Tileable Blur filter causes a dialog box to appear where you can set the blur Radius, whether to Blur horizontally and/or Blur vertically, and which Blur type to use. As explained earlier, IIR works better for photographic images, while RLE works better for computer generated images.
Blur can be a powerful image processing tool, especially when combined with methods such as blurring only selected areas of an image cutting or pasting sharp objects into a blurred image. GIMP provides all the power a graphics professional could need.
More Graphics Design Tips:
• MathML Elements to Display Subscripts and Superscripts
• MathML Element to Display a Radical
• How to Make a Meme
• How to Make a Simple Video
• How to Place Greek Letters in an Inkscape Drawing
• How to Trace an Image Using Inkscape
• Create GIF Animations With Free GIMP Image Editing Program
• SVG Code to Translate a Rectangle and Text
• How to Create a Product Box in Photoshop
• How to Make Beautiful Skies with GIMP


