
If you want to make an animated banner, this tutorial will show you how using Adobe Flash using Actionscript 2.0.
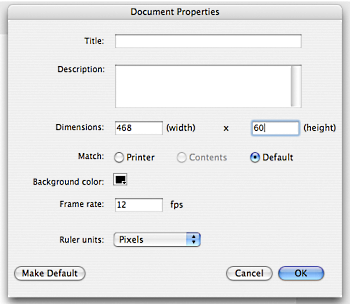
1. Open up Adobe Flash, and make a new document. Modify the document by pressing Command+J for mac, Ctrl+J for PC. In the options, make the size for the banner 468 wide x 60 height (this is the web standard size of a banner), then make the background any color that you want, and click OK. For this tutorial, it will be black.
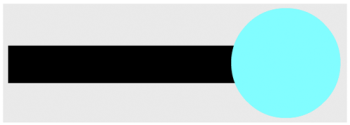
2. Go to your layers, and label the first one whatever it is that you want the first animation to be. In this tutorial, it will be a circle, so the layer itself will be called "circle". Move your mouse to the rectangular tool, click then hold it in order to bring up the menu, and choose the oval tool, then release the mouse. Move to the banner, and create a circle of any size. In this tutorial, the size is pretty big so that only a little bit of the circle will be seen within the banner, and the dimensions are 175.5 x 175.5.
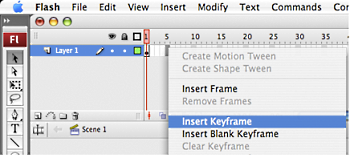
3. Now that you have the circle made, press F8 in order to bring up the convert to symbol box. Click on graphic, then name the symbol "circle" then press OK. You now have made a symbol that you can animate. Go to your layers area, and move the mouse over to the 5th frame, and press F6 (mac and PC). This will create a keyframe that has the circle in the exact same spot. Click back on the 1st frame, then move over to your circle, and click it. We will now make it a fade in animation.
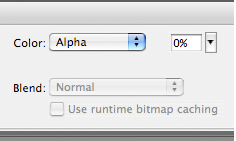
4. Go down to the properties panel on the bottom, and move to the color options. Click on it, and move it to alpha, then set the percent to 0. This will make your circle disappear, but don't worry, because it is still there, it is now only hidden.

5. Go back up to your Layers area, and right click on a keyframe that is between the 1st and last keyframe, and click on "Create Motion Tween". If done correctly, then you have successfully made the first part of the animation. Next, we’ll add the text.

6. Make a new layer, then name it "text" since that is what will be on there. Go to the 6th frame in the "text" layer, right click, then select "Insert New Keyframe" this will give you a blank keyframe to work on. Go over to your tools palette, and click on the "T" to choose the text tool. Move over to your banner, then type in the words you desire. For this tutorial, it will be "banner", and with the text still selected, press F8 to make it a Graphic, and type in "text" for the name, then click OK. Now your text can be animated, as well.
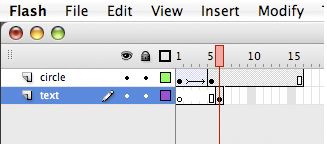
7. Now, go to the "circle" layer, and click on the 6th frame, then click and hold the frame, and drag it until the 16th keyframe. This will make the circle visible throughout the entire animation. Move the text to an area that is within the circle, but to make sure that it is not any bit further left than the circle. Go to your Layers, and click and hold onto the "text" layer, and move it down to be below the "circle" layer. This will make some of the text disappear from being viewable, which is what we want at the moment.

8. Lock the circle layer, and hide it, as well, so that we can make sure that nothing will be damaged, and so that we can see what we are doing. Click on the 15th frame on the text layer, and make a keyframe by pressing F6. Click on the text within the 16th frame, and move it to where you want the text to be on the banner, but make sure that the last letter is further left than the circle. You can click to make the circle visible if you are not sure of where the circle is.

9. Once you have it positioned just where you want it, go up to the layer for "text", then, between the two keyframes, make it a motion tween by right clicking, then selecting "Create Motion Tween". Once that is finished, create a third layer, and call it as for ActionScript. Go to the last frame (16th frame) and make a new keyframe by pressing F6. Go to Window --> Actions, and type in stop (); then close the window.
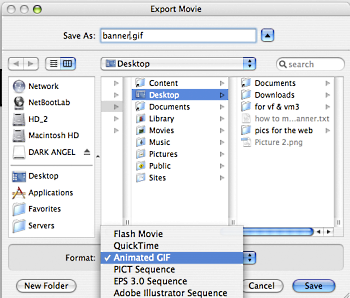
10. Go to where you want to save the animation, and name the animation "banner". Move down to Export As: and click on the part that says .swf, opening the menu for all of the options. Go to "animated gif (.GIF)" and click it, so that it becomes a gif image, then click OK.

11. Congratulations! You have successfully made a basic banner to show off for the web.
Article source: wikiHow wikiHow is a group effort to create a great resource: the world's largest free how to manual. wikiHow articles help people solve their everyday problems. wikiHow licenses all content under a Creative Commons License. The license allows wikiHow content to be used freely for noncommercial purposes. The Creative Commons License also allows for the creation of derivative works.
More Graphics Design Tips:
• How to Create a Simple Video with Windows Movie Maker
• Tips For Hand Coding MathML
• SVG Code for Outlined Letters Text
• How to Create a Game App
• How to Really Create an Arc in SVG
• Export Inkscape Drawing as an Image
• History of Type Development and Type Terminology
• HTML5 Canvas
• Image Processing Filters - How to Sharpen a Photograph
• Create Animated Glistening Gold Text With SVG

