If you don't have an antivirus program configured on your PC, you're probably into other risk-taking activities like bungee jumping and sky diving. Today, with malware such as phishing, spyware, adware, and ransomware threatening your computer, having an antivirus program running is crucial.
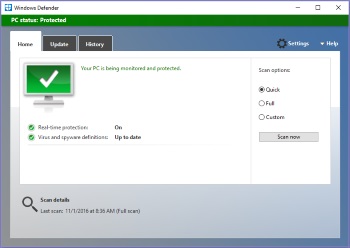
When you first get your PC, you will most likely find a third party antivirus program like McAfee or Norton configured. McAfee and Norton are top notch antivirus programs, and if you're configuring a business computer, there are reasons you should stick with one of those. The disadvantage for the home user is that you have to pay for them. But Windows Defender is Windows 10 built-in antivirus program.
If you find McAfee, Norton or some other third-party antivirus program configured on your computer, first use Control Panel's Programs and Features utility to uninstall it, so that it doesn't conflict with Microsoft's Windows Defender. Then click on the Start button (Windows icon in the lower-left corner of the screen), and in the menu that appears, click on Settings (the gear icon).
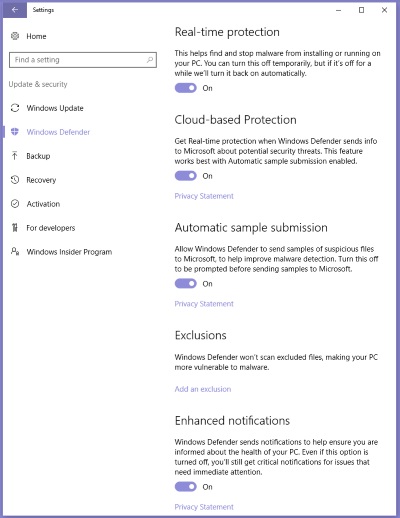
In the Windows Settings Utility that appears, click on the Update & Security link. In the next Windows Settings page that appears, in the left column, click on Windows Defender. On the Windows Defender, set all the slider controls to On.

• Real-time protection means Windows Defender is continuously monitoring your system for malware attempting to install itself.
• Cloud-based protection and Automatic sample submission allows Windows Defender to share with Microsoft information about malware threats it detects.
• Exclusions allows you to set specific files, folders, file types, or processes to not be scanned by Windows Defender. This is normally a foolish thing to do, however in some cases Windows Defender views apps developed with Microsoft Non-proprietary development tools as viruses, especially if they write to critical system files like the registry.
To create a desktop shortcut to Windows Defender, right-click on a blank space on the desktop, in the popup menu that appears, select New > Shortcut. In the dialog box that appears, enter C:\Program Files\Windows Defender\MSASCui.exe. Click on the [Next] button, and in the Name this shortcut text box enter Windows Defender, then click on the [Finnish] button.
More Maintain and Upgrade Your PC Articles:
• How to Backup Your Hard Drive
• Installing an Internal Hard Drive
• Why Not Defragment Your Hard Disk Today?
• Vista's New Boot Loader Architecture
• Be the Master of Your Printer
• Uninterrupted Power Supply (UPS) - Backbone of Your Small Business
• Vista Product Activation
• Hacking Windows Vista
• Tuning-up Windows XP Computer
• Give New Life to Your PC Without Upgrading

