Windows requires many different system files in order to start and run properly. If your computer is not properly protected, a malicious program like a virus or spyware might modify or delete a system file. Or if your system crashes, system file might get corrupted. You can use Windows built-in "System File Checker" utility to scan your computers system files.
1. Select Start | All Programs | Accessories and right-click on Command Prompt.
2. In the popup menu that appears, select Run as Administrator. If the User Account Control message box appears, click on the [Continue] button.

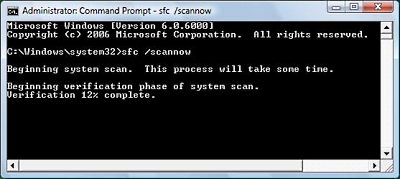
3. At the command prompt, type sfc /scannow.
The message "Beginning System Scan" will appear along with a verification progress report.
The System File Checker scans all system files to verify that they are correct for your version of Windows. If it finds a problem, it will attempt to replace the problematic files from the DLL Cache (%WinDir%\System32\Dllcache\). If the file is not in the DLL Cache or the DLL Cache is corrupted, the user will be prompted to insert the Windows installation DVD.
4. When the System File Checker has completed its report, close the Command window by typing exit next to the prompt.
More Maintain and Upgrade Your PC Articles:
• How to Install a New DVD Drive
• Recognize And Understand Home Networking Components
• Guerrilla Overclocking Primer
• FREE Software - My Control Panel
• Digital Photography Printing - Simplifying the Pixels and DPI's
• Clean-up Your PC
• What's the Difference Between DDR1 DDR2 and DDR3?
• Guide to Getting the Most from Laptop Batteries
• Windows 7 Action Center Lets You Control Alerts
• Avoid Cancer by Using USB Wired Keyboard and Mouse

